Complete walkthrough: Adding CMake to an existing library
In this article, we will explore how we can take two libraries we have developed before on this website (namely the linear algebra solver library and the mesh reader library) and add CMake scripts to them to fully automate the compilation and deployment stages from configuring the project to compilation, testing, documentation generation, installation, and packaging.
By the end of this article, you will have a firm understanding of how to transform any library into a CMake-based project or start writing your own projects from scratch with a CMake build structure in mind. This is a powerful tool and can remove so many headaches when building and deploying software. The time you invest now in reading and learning about how to structure your CMake libraries will save you hours in the future debugging build processes, so see this article as an investment to save yourself time in the future!
All developed code and resources in this article are available for download. If you are encountering issues running any of the scripts, please refer to the instructions for running scripts downloaded from this website.
- Download: Build-Systems-Part-9-meshReaderLib
- Download: Build-Systems-Part-9-linearAlgebraLib
- Download: Build-Systems-Part-9-testing
In this series
[custom_category_posts_list category_slug="automating-cfd-solver-and-library-compilation-using-cmake"]In this article
- Introduction: Revisiting the mesh reader and linear algebra library
- Preparing the mesh reader library
- Project structure
- Changes to source files
- CMake files
- Top-level CMakeLists.txt file
- CMake build files for the mesh reader library
- Optional build arguments
- Creating the mesh reader library
- Testing the mesh reader library with GTest and CTest
- Creating the documentation using Doxygen
- Installing the library using CMake
- Package and install the library using CPack and the Qt Installer Framework (IFW)
- Command line instructions
- Comments on how to prepare the linear algebra solver library
- Testing our newly created CMake-based libraries
- Summary
Introduction: Revisiting the mesh reader and linear algebra library
Some time ago, we were looking at developing two separate libraries; one to work with a linear system of equations to solve a vector matrix equation of the form [katex]\mathbf{Ax}=\mathbf{b}[/katex], and one for reading structured and unstructured grids using the CGNS file format.
Back then, I did not assume any knowledge of CMake, and so we were writing simple bash scripts for UNIX platforms and PowerShell scripts for Windows to get our libraries compiled. This is working well in a vacuum, i.e. if you only want to show how to implement such a library but have no interest in using it afterwards. However, that goes against the ethos I have for this website; I do want you to be able to work with the solutions we are developing on this site. This means we need to be able to install our libraries and make them available to other users (including yourself).
We didn't look at the installation stage in great depth, but this is what I want to look at in today's article. We will revisit our mesh reading library, as well as the linear algebra solver library, and equip it with CMake files that will steer and automate the entire process from finding dependencies and configuring the project, to building, testing, installing, and packaginf our library.
The steps that we follow in this article are very closely linked to what we have done previously, i.e. where we looked at creating a CMake-based project for our complex number library, which was then extended also to include a packaging stage to create a graphical user interface for our installer. I recommend going through these two first if you have not already done so, as the structure of this project is mirrored here, and there are more in-depth discussions about some of the files found in the project.
The starting point for both libraries is the ones we have developed during the documentation series, i.e. where we have equipped both the mesh reading and linear algebra solver library with Doxygen-based documentation. This means we can also automate the documentation process with CMake as well as we have previously seen.
We will start with the mesh reader library, and I will show you how to change the existing library into a structure that CMake can easily use. As alluded to above, we will mirror the project structure for our complex number library. I'll make some comments on how to extend this for the linear algebra solver library as well, but we won't look through all the files again as there aren't that many differences.
Let's get started then and bring both our previously developed libraries into the 21st century!
Preparing the mesh reader library
In this section, we will go through in detail what changes we have to make to our library. These will be mainly looking at the CMake-based files we have to create, but we will also look at some changes to the source code (not because it is required but because I discovered some bugs along the way that were lingering in our originally developed library!).
Project structure
Let's start with our project structure. As mentioned above, this is pretty much exactly the same as the complex number library. The build/ folder will contain all of our build artefacts, the cmake/ folder contains all relevant CMake scripts to steer various parts of the build process, docs/ contains all required input, styling, and user guide files to build our documentation within mesh/ we have our test grids (that we will use in the various tests found in the tests/ folder), and, finally, meshReaderLib/ contains the mesh reading library itself.
root
├── build/
├── cmake/
│   ├── resources/
│   │   ├── logo.icns
│   │   ├── logo.ico
│   │   └── logo.png
│   ├── docs.cmake
│   ├── install.cmake
│   ├── makeLibrary.cmake
│   ├── meshReaderLibConfig.cmake.in
│   ├── options.cmake
│   ├── packaging.cmake
│   └── tests.cmake
├── docs/
│   ├── doxygen-awesome-css-2.3.2/
│   │   └── ...
│   ├── figures/
│   │   └── logo.png
│   ├── userGuide/
│   │   ├── index.md
│   │   ├── installation.md
│   │   ├── introduction.md
│   │   └── usage.md
│   └── Doxyfile.in
├── mesh/
│   ├── structured2D.cgns
│   ├── structured2DNoFamily.cgns
│   ├── unstructured2D.cgns
│   └── unstructured2DNoFamily.cgns
├── meshReaderLib/
│   ├── include/
│   │   ├── CMakeLists.txt
│   │   ├── readMeshBase.hpp
│   │   ├── readStructuredMesh.hpp
│   │   ├── readUnstructuredMesh.hpp
│   │   └── types.hpp
│   ├── src/
│   │   ├── CMakeLists.txt
│   │   ├── readMeshBase.cpp
│   │   ├── readStructuredMesh.cpp
│   │   └── readUnstructuredMesh.cpp
│   ├── CMakeLists.txt
│   └── meshReader.hpp
├── tests/
│   ├── unit/
│   │   ├── CMakeLists.txt
│   │   ├── testStructuredMesh.cpp
│   │   └── testUnstructuredMesh.cpp
│   └── CMakeLists.txt
├── CMakeLists.txt
├── conanfile.txt
├── LICENSE
└── README.md
We have a top-level CMakeLists.txt file that we will look at in a second, the conanfile.txt so that we can bring all dependencies (not the mesh reader lib, but the dependencies it depends on, i.e. here, the CGNS library), as well as the LICENSE and README.md file.
Changes to source files
Within the meshReaderLib/ folder, we store all of our source and header files. We are going to leave them as they are, and I am not going anywhere near trying to explain their content; for that, we have a dedicated series that explains each file line-by-line. If you haven't already gone through this series but want to know how to read a structured and unstructured grid, then this series is for you!
I want to talk about a few minor changes I made, though, as I was going through the development of this project, as it is common to discover some bugs here and there despite all the tests we wrote before. In particular, I am looking at the getStartLocationForElementConnectivity() function in the ReadUnstructuredMesh class. Without going into much detail, all elements within the internal mesh, the boundaries, and any interfaces, are all written into the same array, and so we need to separate them.
We do this by determining the start location of each element type (internal, boundary, or interface element) and storing that in different arrays. We may have more than one interface or boundary, or we may have different element types for the internal mesh (i.e. triangles and quads). Thus, we need to record the start location of each element within an array. For more details, please see the original write-up for the unstructured mesh reading class, where I talk about the necessity of this function and how it works.
At some point, we have code like the one shown below:
cgsize_t donorData, points;

if (cg_conn_read(_fileIndex, 1, zone + 1, interface + 1, &points, donorDataType, &donorData)) cg_error_exit();

interfaceElementStart[zone].push_back(points);
Here, we read the points (vertices) that are located within a given zone and interface. We see that the points variable is of size cgsize_t, which wraps around size_t, which in turn is a long int on my system. Do you see the problem? We define a single variable to hold a number of points. This means that the cg_conn_read() function is asking for an address to write these points to, which we do provide by providing the address of points, i.e. &points, but it can only hold a single value and cg_conn_read() may write more than one point if we have several in our interface.
Since we are essentially dealing with pointers here (technically, we don't have pointers, but we are working with memory addresses here, which is what pointers are doing), the code will compiled. It will even run without causing any issues, but on certain platforms, under certain conditions, you will get a runtime error (which you can ignore, and the code works fine again; at least, this is my observed behaviour during testing).
When I say certain platforms, Windows is the only one pointing out this issue. I did not receive any warning on UNIX when testing this code. Well done Bill Gates, sometimes Windows is surprising me with a glimpse of competency. Just like Lance Stroll, but let's not go there.
So, the fix is rather straightforward: we have to declare a std::vector and let the points array (as well as the donorData array, which we aren't using, though) be of a certain length (which we obtain by a call to cg_conn_info() which is not shown here). This is shown below:
std::vector<cgsize_t> points(numberOfPoints);
std::vector<cgsize_t> donorData(numberOfDonorCells);

if (cg_conn_read(_fileIndex, 1, zone + 1, interface + 1, &points[0], donorDataType, &donorData[0]))
  cg_error_exit();

interfaceElementStart[zone].push_back(points[0]);
Since we are now working with an array structure, it is not sufficient to pass the address of the array, but we need to specify the first element we want to write to. In this case, we want to write to the first location, so we specify &points[0]. Then, instead of pushing just points to the interfaceElementStart std::vector on line 7, we specifically request only the first point, as this will be the start location, to be inserted into the std::vector. Quick fix!
There were a few more places (three or four) where I did a very similar fix; the nature of the runtime error is the same, as is the fix, so there is no need to dwell on them. The code that you can download at the beginning of this article contains all these bug fixes.
CMake files
The CMake files are essentially a copy and paste of the complex number library example. which was first discussed at length during the documentation automation article and then enhanced by the article on packaging using a graphical installer. For completeness, all files are listed here, but there won't be as much detail here, please feel free to read the previous two articles first (at least the part on the CMake scripts) and then return here.
Top-level CMakeLists.txt file
The top-level CMakeLists.txt file follows a predictable pattern; first, we require at least CMake version 3.23 to work with the FILE_SET header functionality, which is the latest introduced feature that we use throughout our CMake build scripts, and a call to the project() command, which sets some essential meta description. We also require at least a C++ standard of 2017, as we are using the filesystem header in this project, which was not available before the 2017 standard. Seriously, until 2017 we weren't able to deal with files in a sensible way in C++ ...
cmake_minimum_required(VERSION 3.23)

project(meshReaderLib
  LANGUAGES CXX
  VERSION 1.0.0
  DESCRIPTION "A C++ library to read structured and unstructured grids for CFD applications"
)

# Set the C++ standard to at least C++17
set(CMAKE_CXX_STANDARD 17)
set(CMAKE_CXX_STANDARD_REQUIRED ON)

# include custom options
include(cmake/options.cmake)

# create mesh reader library target
include(cmake/makeLibrary.cmake)

# go through the meshReaderLib/ subdirectory and add any files to the library as needed
add_subdirectory(meshReaderLib)

# add tests if requested
include(cmake/tests.cmake)

# create the documentation if requested
include(cmake/docs.cmake)

# install the library and its headers
include(cmake/install.cmake)

# package the project with a cross-platform GUI installer
include(cmake/packaging.cmake)
We then delegate various tasks of the build process to various scripts, which we include here, just as we did in the complex number library example. One difference here is the CMake files within the meshReaderLib/ directory, although we are still using the same calls, just adapted to a different folder structure. This is explored in the next section.
CMake build files for the mesh reader library
Within the meshReaderLib/ folder, we have three CMakeLists.txt files. One within the folder itself, and then one each within the include/ and src/ folder. The CMake file in the meshReaderLib/ folder is given below:
add_subdirectory(include)
add_subdirectory(src)

target_sources(${CMAKE_PROJECT_NAME}
  PUBLIC FILE_SET HEADERS
  BASE_DIRS ${PROJECT_SOURCE_DIR}
  FILES ${CMAKE_CURRENT_SOURCE_DIR}/meshReader.hpp
)
We say that we want to include the CMakeLists.txt files within the include/ and src/ directory on lines 1-2, and then we add the main header include file, i.e. meshReaderLib/meshReader.hpp on lines 4-8. This is the file we need to include later in our project so that we can use this library. We designate this file to be within the HEADERS group of the FILE_SET command, which will ensure that this file will get installed as part of the installation step.
Within the meshReaderLib/include/CMakeLists.txt file, we have the following content:
target_sources(${CMAKE_PROJECT_NAME}
  PUBLIC FILE_SET HEADERS
  BASE_DIRS ${PROJECT_SOURCE_DIR}
  FILES
    ${CMAKE_CURRENT_SOURCE_DIR}/readMeshBase.hpp
    ${CMAKE_CURRENT_SOURCE_DIR}/readStructuredMesh.hpp
    ${CMAKE_CURRENT_SOURCE_DIR}/readUnstructuredMesh.hpp
    ${CMAKE_CURRENT_SOURCE_DIR}/types.hpp
)
This is again the same call to target_sources(), where we include all header files using the FILE_SET command for the current target (here ${CMAKE_PROJECT_NAME}, which evaluates to meshReaderLib). We list all header files so that we can ensure they are available after installation.
Finally, within the meshReaderLib/srx/CMakeLists.txt file, we have the following lines:
target_sources(${CMAKE_PROJECT_NAME}
  PRIVATE
    ${CMAKE_CURRENT_SOURCE_DIR}/readMeshBase.cpp
    ${CMAKE_CURRENT_SOURCE_DIR}/readStructuredMesh.cpp
    ${CMAKE_CURRENT_SOURCE_DIR}/readUnstructuredMesh.cpp
)
We add all source files to the current target (meshReaderLib), and mark them as PRIVATE. Thus, after the files are compiled, they will not be exported, and any other library making use of meshReaderLib can compile their code and link against this library without having to compile the source files again. This is in contrast to the headers declared above, which are PUBLIC, as we need to know about the header files as we will include them in projects that consume the meshReaderLib library. Thus, PUBLIC header files will get installed, PRIVATE source files won't.
Optional build arguments
The build arguments are located in cmake/options.cmake are the same as we saw before for the complex number library and given below:
option(ENABLE_SHARED "Build shared (dynamic) library? If set to off, a static library will be built" OFF)
option(BUILD_DOCS "Build the documentation. This requires doxygen to be available" OFF)
option(ENABLE_TESTS "Build the tests. This requires googletest to be available" OFF)
We offer to build either a static or dynamic (shared) library, turn on documentation if required, and allow for tests to be build during the development stage. All are set to off by default and we can steer their behaviour through command line settings when we call CMake later.
Creating the mesh reader library
The mesh reading library is created within the cmake/makeLibrary.cmake file. It is just slightly different to the complex number library example we have worked on, which I will go into below the script.
# Add a postfix for debug library builds to avoid name clashes with release builds
if(WIN32)
  set(CMAKE_DEBUG_POSTFIX d)
endif()

# we require the CGNS library to be available, so check for it first
find_package(CGNS REQUIRED)

if(${ENABLE_SHARED})
  # Create a shared (dynamic) library for the mesh reader library
  add_library(${CMAKE_PROJECT_NAME} SHARED)

  # add correct compiler flags so that we can correctly import/export symbols
  if (MSVC)
    target_compile_definitions(${CMAKE_PROJECT_NAME} PUBLIC COMPILEDLL)
  endif()
else()
  # Create a static library for the mesh reader library
  add_library(${CMAKE_PROJECT_NAME} STATIC)

  # add correct compiler flags so that we can correctly import/export symbols
  if (MSVC)
    target_compile_definitions(${CMAKE_PROJECT_NAME} PUBLIC COMPILELIB)
  endif()
endif()

# link our library to the CGNS library
target_link_libraries(${CMAKE_PROJECT_NAME} PUBLIC CGNS::CGNS)

# include directories of our current project
target_include_directories(${CMAKE_PROJECT_NAME}
  PUBLIC
    $<BUILD_INTERFACE:${CMAKE_CURRENT_SOURCE_DIR}>
    $<INSTALL_INTERFACE:${CMAKE_INSTALL_INCLUDEDIR}>
)
First, we satisfy the overlords at Microsoft and append the letter d to our debug libraries, otherwise we'll break Windows if we need debug. and release builds at the same time. Then, we request that the CGNS library must be found before we continue on line 7. Then, we follow pretty much the same structure as we saw before, i.e. we check if we want to build a static or dynamic (shared) library and then create the library with a call to add_library() accordingly.
On Windows, we'll also have to add a pre-processor directive to tell the library what type it is, i.e. we pass either COMPILEDLL or COMPILELIB to the compiler. This will be used in the mesh reading library to set the correct __declspec() directives, and if that means nothing to you, don't fret, I have a write-up discussing the need for __declspec()ing your code. There is also part 2 of this if you want to get lost in this rabbit hole (you don't, but it is there if you need it).
Compared to the complex number library, I have defined each pre-processor directive as PUBLIC, so we set them here and then never have to worry about them again (i.e. projects that consume our library will get the same pre-processor directives and the users are none the wiser about __declspec()s). What a service we are providing, 5 out 5 stars!
On line 28, we link against the CGNS library for our current library (regardless of its type, i.e. it can be either a static or dynamic (shared) library). Finally, we include the top-level project directory so that we can make relative includes in our code, i.e. we want to be able to have include statements such as:
#include "meshReaderLib/meshReader.hpp"In order for this to work, we need to know where the meshReaderLib/ folder is located. This is what we do with the call to target_directory_include() on lines 31-35. It will be different when we install the project compared to if we just build the project locally, i.e. the absolute path will be different, and hence we use generator expressions which determine if we are compiling or installing our library at the moment, and then set the (absolute) include path accordingly.
Perhaps the include path for the build of CMAKE_CURRENT_SOURCE_DIR is tripping you up. Shouldn't that be the current directory that we are processing? So, if we are in cmake/makeLibrary.cmake, shouldn't the current source directory be cmake/? No, the current source directory is still the project's root folder since we include this file with a call to include(). This will simply dump the content of this file into our top-level CMakeLists.txt file, so the current source directory remains the top-level project directory.
If we use a call to add_subdirectory(), then CMake will change into that directory and the CMAKE_CURRENT_SOURCE_DIR will change, but not with a call to include(). If this is making you feel sick, or you simply don't care, then simply use CMAKE_SOURCE_DIR which will always point to the project's top-level directory.
Testing the mesh reader library with GTest and CTest
We want to test our mesh reading library as well, and since we already have developed all of our unit tests with GTest, we can simply add them to CTest and tell it to run our tests later automatically for us. This part is slightly different to the complex number library example, as we have a few more things to take care of, which is shown in the script below:
# define a function that can be used to add tests automatically
function (create_test name)
  # each test creates its own executable
  add_executable(${name} ${name}.cpp)

  # we need to link each test separately against google test and any additional libraries
  target_link_libraries(${name} PUBLIC gtest::gtest CGNS::CGNS ${CMAKE_PROJECT_NAME})

  # include the root level directory for each executable so we can find header files relative to the root
  target_include_directories(${name} PRIVATE ${CMAKE_SOURCE_DIR})

  # register the test with CTest, so we execute it automatically when running CTest later
  add_test(NAME ${name} COMMAND $<TARGET_FILE:${name}>)

  # copy the mesh directory to the test directory
  add_custom_command(TARGET ${name}
    POST_BUILD
    COMMAND ${CMAKE_COMMAND} -E copy_directory_if_different ${CMAKE_SOURCE_DIR}/mesh $<TARGET_FILE_DIR:${name}>/mesh
  )

  # if we generated a dynamic (shared) library, copy it to the test directory as well
  if (ENABLE_SHARED)
    add_custom_command(TARGET ${name}
      POST_BUILD
      COMMAND ${CMAKE_COMMAND} -E copy_if_different $<TARGET_FILE:${CMAKE_PROJECT_NAME}> $<TARGET_FILE_DIR:${name}>
    )
  endif()
endfunction()

# create the tests if requested
if(ENABLE_TESTS)
  enable_testing()

  # find and enable google test
  find_package(GTest REQUIRED)

  # go through tests subdirectory and add all tests to CTest
  add_subdirectory(tests)
endif(ENABLE_TESTS)
First, just as we did with the complex number example, we create a function on line 2, which we name create_test(). We can use this function in our tests/unit/CMakeLists.txt file as
# add tests
create_test(testStructuredGrid)
create_test(testUnstructuredGrid)
Here, the argument passed to the create_test() function is the name of the source file of the test, and we will reuse that name for the executable we generate on line 4. We now link not just against the gtest library on line 7 for this executable but also against the CGNS library, as well as the library we are creating as part of this project (as this is the library we want to test, so the executable needs to know about it in order to test it).
We include the relevant directories on line 10, and since we are not interested in installing tests, we don't need any generator expression magic here to set the include directory. We follow this with a call to add_test(), which CTest uses to register this executable with the automatic test runner, which will be executed when we call CTest from the command line.
Then, we have to copy statements, which require a bit more explaining. First, on lines 16-19, we use the add_custom_command() to copy the mesh/ directory where our test executables will be located. We don't know where our tests will be located at configure time, so we use a generator expression again here to determine their location. We also say this should be a POST_BUILD type, i.e. only once everything is compiled, copy this folder.
Furthermore, we request that this folder is only copied if it is different from the folder that may already be present at the location. If the folder isn't there (i.e. we start with a clean and empty build/ folder), then it will be copied. But since we may call the create_test() function a few times, we don't want to overwrite the mesh/ folder every time we create a test (this will be slow). Since we have to use a generator expression to know about the location where we should copy this folder, we can't separate this call from the create_test() function.
Lines 22-27 operate in a similar manner, only here we check if we are building a dynamic (shared) library, i.e. a library ending in *.so on Linux, *.dll on Windows, or *.dylib on macOS. If that is the case, we copy the generated dynamic (shared) library next to the test executables so they can find all functions declared within these libraries.
Lines 31-39 check if we want to build tests as part of our project, and if this is set to true, then we first enable testing on line 32 (which will set up the testing environment for us in the background, which includes making CTest available to us). We require that GTest is available and CMake knows where to find it (thanks to Conan, this is no longer a problem). Then, we simply go into the tests subdirectory, where we create unit tests using the create_test() function.
Creating the documentation using Doxygen
If you have followed the documentation article on CMake, then the cmake/docs.cmake file shown below will look familiar, we haven't really changed anything. We use Doxygen here to build our documentation, and so we require that this will be available on line 2.
# use doxygen for building the documentation, check that it is available
find_package(Doxygen)

if (BUILD_DOCS)
  if (DOXYGEN_FOUND)
    # create Doxyfile
    configure_file(${PROJECT_SOURCE_DIR}/docs/Doxyfile.in ${CMAKE_BINARY_DIR}/Doxyfile @ONLY)

    # note the option ALL which allows to build the docs together with the application
    add_custom_target(doxygenDocs ALL
      COMMAND ${DOXYGEN_EXECUTABLE} ${CMAKE_BINARY_DIR}/Doxyfile
      WORKING_DIRECTORY ${CMAKE_CURRENT_BINARY_DIR}
      COMMENT "Generating API documentation with Doxygen"
    )
  else (DOXYGEN_FOUND)
    message(WARNING "Doxygen need to be installed to generate the doxygen documentation")
  endif (DOXYGEN_FOUND)
endif (BUILD_DOCS)
The only major difference here is in the docs/Doxyfile.in, which has now be adjusted for the mesh reader library, though, since we are using mostly CMake variables here, it won't have changed that much compared to the complex number documentation example. For completeness, though, here are all the lines that we have changed:
PROJECT_NAME           = @CMAKE_PROJECT_NAME@
PROJECT_NUMBER         = @CMAKE_PROJECT_VERSION_MAJOR@.@CMAKE_PROJECT_VERSION_MINOR@.@CMAKE_PROJECT_VERSION_PATCH@
PROJECT_BRIEF          = @CMAKE_PROJECT_DESCRIPTION@
PROJECT_LOGO           = @CMAKE_SOURCE_DIR@/docs/figures/logo.png
OUTPUT_DIRECTORY       = docs
HTML_EXTRA_STYLESHEET  = @CMAKE_SOURCE_DIR@/docs/doxygen-awesome-css-2.3.2/doxygen-awesome.css
HTML_EXTRA_STYLESHEET += @CMAKE_SOURCE_DIR@/docs/doxygen-awesome-css-2.3.2/doxygen-awesome-sidebar-only.css
INPUT                  = @CMAKE_SOURCE_DIR@/meshReaderLib
INPUT                 += @CMAKE_SOURCE_DIR@/docs/userGuide/index.md
INPUT                 += @CMAKE_SOURCE_DIR@/docs/userGuide/introduction.md
INPUT                 += @CMAKE_SOURCE_DIR@/docs/userGuide/installation.md
INPUT                 += @CMAKE_SOURCE_DIR@/docs/userGuide/usage.md
These changes are in addition to the ones we discussed back in the original article on Doxygen, where we have made a few more changes to allow for things like LaTeX equations and the like. Have a look through that article as well to see what options we may want to tweak.
Installing the library using CMake
Once our library is compiled and tested and the documentation has been built, we are ready to install our library into a permanent location on our hard disk. For that, we need two files. First, a configuration file that tells other CMake-based projects where to find all relevant files of our library, and then the cmake/install.cmake file itself, which lists all of the installation rules.
The configuration file is shown below and is located at cmake/meshReaderLibConfig.cmake.in:
@PACKAGE_INIT@

include(CMakeFindDependencyMacro)

# any additional libraries we depend on should go here
find_dependency(CGNS REQUIRED)

include("${CMAKE_CURRENT_LIST_DIR}/meshReaderLibTargets.cmake")
The @PACKAGE_INIT@ variable will be replaced later, mainly containing the top-level directory of where to find the library and its include files (i.e. headers). Since this project depends on the CGNS library, we communicate to other projects that want to use this library that the CGNS library needs to be installed. If it is not, CMake will abort.
The cmake/install.cmake file is shown below. Other than a search and replace for complexNumberLib with meshReaderLib, this file hasn't changed compared to the complex number library example. We looked at this file in depth during the installation article (although here, it was part of one giant top-level CMakeLists.txt file instead of being separated into its own file within the cmake/ folder), which contains a lot more information about the various parts in this file.
# install the headers that we specified with FILE_SET (header files for the user to include in their projects)
install(TARGETS ${CMAKE_PROJECT_NAME}
  EXPORT meshReaderLibTargets
  FILE_SET HEADERS
  COMPONENT meshReaderLib
)

# provide some basic meta data about the library to generate the library's config file
install(
  EXPORT meshReaderLibTargets
  FILE meshReaderLibTargets.cmake
  DESTINATION "lib/cmake/meshReaderLib"
  NAMESPACE meshReaderLib::
  COMPONENT meshReaderLib
)

# generate the library's config file
include(CMakePackageConfigHelpers)
configure_package_config_file(
  cmake/meshReaderLibConfig.cmake.in
  "${CMAKE_CURRENT_BINARY_DIR}/meshReaderLibConfig.cmake"
  INSTALL_DESTINATION "lib/cmake/meshReaderLib"
)

# install the config file
install(
  FILES "${CMAKE_CURRENT_BINARY_DIR}/meshReaderLibConfig.cmake"
  DESTINATION "lib/cmake/meshReaderLib"
  COMPONENT meshReaderLib
)

# install the documentation if requested
if (BUILD_DOCS)
  install(
    DIRECTORY ${CMAKE_BINARY_DIR}/docs/html
    DESTINATION docs/meshReaderLib/
    COMPONENT documentation
  )
endif(BUILD_DOCS)
The only part not discussed in the above-liked article is lines 33-39, which are responsible for building the documentation. However, we discussed that in more detail in the documentation article if you need to read more about this part.
Package and install the library using CPack and the Qt Installer Framework (IFW)
The package information hasn't changed, and it's pretty much identical to what we have discussed in the packaging article using CPack and the Qt Installer Framework (IFW). Again, the only changes we have made are to the descriptions given to the various DISPLAY_NAME and DESCRIPTION variables for the IFW installer. Otherwise, this file also follows a predictable pattern and has been discussed in depth in the above-linked article.
# set some project metadata for the installer
set(CPACK_PACKAGE_NAME ${CMAKE_PROJECT_NAME})
set(CPACK_PACKAGE_VENDOR "cfd.university")
set(CPACK_PACKAGE_CONTACT "tom@cfd.university")
set(CPACK_PACKAGE_DESCRIPTION_SUMMARY ${CMAKE_PROJECT_DESCRIPTION})
set(CPACK_PACKAGE_INSTALL_DIRECTORY ${CPACK_PACKAGE_NAME})
set(CPACK_PACKAGE_VERSION_MAJOR ${CMAKE_PROJECT_VERSION_MAJOR})
set(CPACK_PACKAGE_VERSION_MINOR ${CMAKE_PROJECT_VERSION_MINOR})
set(CPACK_PACKAGE_VERSION_PATCH ${CMAKE_PROJECT_VERSION_PATCH})
set(CPACK_VERBATIM_VARIABLES YES)

# if we not call the line below, groups won't show properlly in the GUI installer
set(CPACK_COMPONENTS_GROUPING IGNORE)

# ignore directories and files
set(CPACK_SOURCE_IGNORE_FILES
  "/.git/"
  "/.vscode/"
  "/build/"
  "/CMakeCache.txt"
  "/CMakeFiles/"
  "/cmake_install.cmake"
  "/CPackConfig.cmake"
)

# we are interested in cross-platform support. IFW is the only generator that allows for it, so set it explicitly
set(CPACK_GENERATOR "IFW")
set(CPACK_IFW_ROOT "C:/Qt/Tools/QtInstallerFramework/4.8")

# set some IFW specific variables, which can be derived from the more generic variables given above
set(CPACK_IFW_VERBOSE ON)
set(CPACK_IFW_PACKAGE_TITLE ${CPACK_PACKAGE_NAME})
set(CPACK_IFW_PACKAGE_PUBLISHER ${CPACK_PACKAGE_VENDOR})
set(CPACK_IFW_PRODUCT_URL "https://cfd.university")

# create a more memorable name for the maintenance tool (used for uninstalling the package)
set(CPACK_IFW_PACKAGE_MAINTENANCE_TOOL_NAME ${PROJECT_NAME}_MaintenanceTool)
set(CPACK_IFW_PACKAGE_MAINTENANCE_TOOL_INI_FILE ${CPACK_IFW_PACKAGE_MAINTENANCE_TOOL_NAME}.ini)

# customise the theme if required
set(CPACK_IFW_PACKAGE_WIZARD_STYLE "Modern")

# adjust the default size
set(CPACK_IFW_PACKAGE_WIZARD_DEFAULT_HEIGHT 400)

# set the installer icon and logo
if(WIN32)
  set(CPACK_IFW_PACKAGE_ICON ${CMAKE_CURRENT_LIST_DIR}/resources/logo.ico)
  elseif(APPLE)
  set(CPACK_IFW_PACKAGE_ICON ${CMAKE_CURRENT_LIST_DIR}/resources/logo.icns)
endif()
set(CPACK_IFW_PACKAGE_WINDOWS_LOGO ${CMAKE_CURRENT_LIST_DIR}/resources/logo.png)
set(CPACK_IFW_PACKAGE_LOGO ${CMAKE_CURRENT_LIST_DIR}/resources/logo.png)

# now include the relevant (cross-platform) packaging script
include(CPack)
include(CPackIFW)

# add the library as a component to the installer
cpack_add_component(meshReaderLib
  REQUIRED
  DISPLAY_NAME "Mesh Reader Library"
  DESCRIPTION "Install the CGNS-based mesh reader library"
)

cpack_ifw_configure_component(meshReaderLib
  REQUIRED
  LICENSES "MIT License" ${CMAKE_SOURCE_DIR}/LICENSE
  SORTING_PRIORITY 99
)

# add the documentation under a "developer" group component
if (BUILD_DOCS)
  cpack_add_component(documentation
    DISPLAY_NAME "API Documentation"
    DESCRIPTION "Documentation for the mesh reader library"
    GROUP documentationGroup
  )

  cpack_ifw_configure_component(documentation
    DEFAULT FALSE
    GROUP documentationGroup
    SORTING_PRIORITY 1
  )

  cpack_add_component_group(documentationGroup
    EXPANDED
    DISPLAY_NAME "Documentation"
    DESCRIPTION "Install the mesh reader library documentation"
  )

  cpack_ifw_configure_component_group(documentationGroup
    SORTING_PRIORITY 1
  )
endif(BUILD_DOCS)
Command line instructions
Now that we have all CMake files in place, we are ready to test-drive them and make sure that everything is working as expected. We will look at the commands we need to get this project compiled, tested, and installed, all from within the command line.
Bringing in additional dependencies
First things first, we are going to use Conan again to manage our dependencies. No need for long, custom made, fragile and probably easily breakable bash and PowerShell scripts to install CGNS manually on our system. Let's use a package manager who's job it is to make sure that packages can be built correctly (and ensure that they will continue to be built correctly in the future).
For that, we have the conanfile.txt in the top-level directory. The content is given below:
[requires]
cgns/4.3.0
gtest/1.14.0

[generators]
CMakeDeps
CMakeToolchain

[tool_requires]
doxygen/1.9.4
We see that we need the CGNS and GTest libraries to compile our code correctly. We also require Doxygen as a tool (since it is an executable, not a library) so that we can build our documentation correctly. To install these dependencies, run the following command:
conan install . -pr dev --output-folder=build --build=missingHere, I am using a specific profile called dev which is located in your user's home directory under .conan2/profiles. You will have, at a minimum, a default profile, but I like to keep a development profile handy so I can set things like my preferred build type (Debug), generator (Ninja) and console (PowerShell on Windows, not the default!). I have discussed my developer profile in my article on building documentation with CMake, have a look if this is new to you.
After we have finished with Conan, change into the build/ directory (and stay there for subsequent CMake calls) and execute either .\conanbuild.ps1 on Windows (if you are using good old cmd.exe, you are allowed to use .\conanbuild.bat as well, but PowerShell is a more user-friendly experience), or ./conanbuild.sh on UNIX (if you have a different shell, you may have a different file ending; whichever shell you use, just execute the generated conanbuild.* file that makes sense on your system). We are now ready to compile the project.
Configuring the project
We do our normal CMake configuration step first before we do any compilation. For this particular project, I am using the following call:
cmake -DCMAKE_BUILD_TYPE=Debug -DCMAKE_TOOLCHAIN_FILE="conan_toolchain.cmake" -DBUILD_DOCS=ON -DENABLE_SHARED=ON -DENABLE_TESTS=ON -G Ninja ..Here, we turn on the documentation, we say that we want to build a dynamic (shared) library, and we say that we want to build all tests as well. I am using my generator of choice here, which is Ninja, but feel free to use any other generator here instead or simply let CMake decide which one to choose by omitting the -G Ninja flag.
Compiling the library
With the configuration done (fingers crossed, no errors occurred; if they did, it has most likely to do with dependencies not being resolved correctly, in which case, make sure Conan was able to install all dependencies correctly), we can proceed to build the project, which is as simple as calling:
cmake --build . --config DebugTesting that everything works
To test that our library was created correctly and is working as intended, we may spend a second to type
ctestinto our console, which will then, in turn, take another second or so to run all tests that are available in our project. I think a 2 second time investment is doable and not asking for too much! The output of CTest is shown below:
Test project C:/Users/tom/code/cfd-university/buildSystems/Build-Systems-Part-9-meshReaderLib/build
    Start 1: testStructuredGrid
1/2 Test #1: testStructuredGrid ...............   Passed    0.16 sec
    Start 2: testUnstructuredGrid
2/2 Test #2: testUnstructuredGrid .............   Passed    0.28 sec

100% tests passed, 0 tests failed out of 2

Total Test time (real) =   0.44 sec
If you are using VSCode and you have the test explorer plugin installed, you can also run all tests from within the IDE, as shown below:
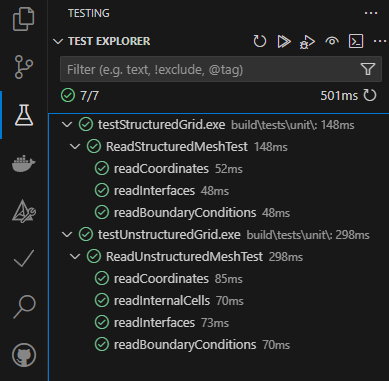
All tests are passing, and no strange runtime error message on Windows. Happy days!
Installing the mesh reader library through the command line
Now that we have compiled the library and are confident that it is working as expected, we can install it into a permanent directory using the --install target. This is shown below where the permanent location is at C:\temp (yes, the folder temp/ does suggest a very permanent structure, I know).
cmake --install . --prefix C:\temp --config DebugPackage the project for easy distribution
If we only want to use the library on our system, we are pretty much done. However, if we also want to provide a graphical user interface for the installation step, then we can use CPack to provide one. Since we already have everything set up and specifically asked that the Qt Installer Framework be used, we can simply call
cpackand this will generate an executable installer within our build/ directory.
Comments on how to prepare the linear algebra solver library
To get a CMake-based project for our linear algebra solver library as well, we pretty much follow the steps above and replace any string similar to meshReaderLib with linearAlgebraLib. The linearAlgebraLib/ folder is slightly different in that it only contains a src/ folder, and no include/ folder (we store both *.cpp and *.hpp files in the same directory), so our CMakeLists.txt file slightly changes within the linearAlgebraLib/ folder (where we simply merge the target_sources() call from the include/ and src/ directory within the meshReaderLib/ directory into a single command).
For completeness, here is the content of the linearAlgebraLib/src/CMakeLists.txt file:
target_sources(${CMAKE_PROJECT_NAME}
  PRIVATE
    ${CMAKE_CURRENT_SOURCE_DIR}/conjugateGradient.cpp
    ${CMAKE_CURRENT_SOURCE_DIR}/linearAlgebraSolverBase.cpp
    ${CMAKE_CURRENT_SOURCE_DIR}/sparseMatrixCSR.cpp
    ${CMAKE_CURRENT_SOURCE_DIR}/vector.cpp
  PUBLIC FILE_SET HEADERS
  BASE_DIRS ${PROJECT_SOURCE_DIR}
  FILES
    ${CMAKE_CURRENT_SOURCE_DIR}/conjugateGradient.hpp
    ${CMAKE_CURRENT_SOURCE_DIR}/linearAlgebraSolverBase.hpp
    ${CMAKE_CURRENT_SOURCE_DIR}/sparseMatrixCSR.hpp
    ${CMAKE_CURRENT_SOURCE_DIR}/vector.hpp
)
The tests/ folder is also slightly different in that we now have how unit, integration, and system tests. However, we use the same create_test() function we have defined previously for all three types of tests. We no longer have to copy the mesh directory, but we do have to copy the dynamic (shared) library of the linear algebra solver library next to our test executable.
Both the test executables and the linear algebra solver library itself are now, of course, no longer linked against the CGNS library, and so we have removed this library from our CMake scripts, as well as from conanfile.txt.
These are the only changes. Instead of going through them again here in detail, you can download the library at the top of this article to inspect it for the changes mentioned above. If you understood how we created the mesh reader library, then you should feel comfortable working with the linear algebra solver library, too!
Testing our newly created CMake-based libraries
Now that we have compiled and installed both the mesh reader and linear algebra solver library, it is time to use them in another test project to make sure the installation is working correctly. For this, we will develop a very small (and meaningless) example, that will, however, test that both libraries where compiled and found correctly, so that they can be used in other projects. This also provides a template for how we would use our library in an actual project that is consuming our libraries.
Project structure
Our test project has the following small structure:
root
├── build/
├── mesh/
│   └── structured2D.cgns
├── CMakeLists.txt
├── conanfile.txt
└── main.cpp
As per usual, we have a build/ folder for CMake and Conan to write their output to, a mesh/ folder that just contains one of the meshes we used in the mesh reading library for unit testing, a top-level CMakeLists.txt file that steers the entire process of building our test example, a conanfile.txt to bring in dependencies (more on this shortly), and finally, a main.cpp file, which will consume both the mesh reading and linear algebra solver library.
Let's look through these file in detail; they are all relatively small scripts and quick to go through.
Writing a simple test program
Let's start with the source file first: the main.cpp file is given below:
#include <iostream>

#include "linearAlgebraLib/linearAlgebraLib.hpp"
#include "meshReaderLib/meshReader.hpp"

int main() {

  // sanity check that linearAlgebraLib is working and found
  linearAlgebraLib::SparseMatrixCSR matrix(3, 3);
  matrix.set(0, 0, 1.0); matrix.set(0, 1, 2.0); matrix.set(0, 2, 0.0);
  matrix.set(1, 0, 2.0); matrix.set(1, 1, 1.0); matrix.set(1, 2, 2.0);
  matrix.set(2, 0, 0.0); matrix.set(2, 1, 2.0); matrix.set(2, 2, 1.0);

  linearAlgebraLib::Vector vector(3);
  vector[0] = 1.0; vector[1] = 0.0; vector[2] = 1.0;

  std::cout << "Testing linearAlgebraLib:\n" << matrix * vector << std::endl;

  // sanity check that meshReaderLib is working and found
  ReadStructuredMesh mesh("../mesh/structured2D.cgns");
  mesh.readMesh();
  auto coordinates = mesh.getCoordinates();

  // print first 5 coordinates
  std::cout << "\nTesting meshReaderLib:\nX | Y " << std::endl;
  std::cout << "------" << std::endl;
  std::cout << coordinates[0][0][0][COORDINATE::X] << " | " << coordinates[0][0][0][COORDINATE::Y] << std::endl;
  std::cout << coordinates[0][0][1][COORDINATE::X] << " | " << coordinates[0][0][1][COORDINATE::Y] << std::endl;
  std::cout << coordinates[0][0][2][COORDINATE::X] << " | " << coordinates[0][0][2][COORDINATE::Y] << std::endl;
  std::cout << coordinates[0][0][3][COORDINATE::X] << " | " << coordinates[0][0][3][COORDINATE::Y] << std::endl;
  std::cout << coordinates[0][0][4][COORDINATE::X] << " | " << coordinates[0][0][4][COORDINATE::Y] << std::endl;

  return 0;
}
Apart from iostream, we include the main header include files of both libraries on lines 2-3. Notice how we specify their relative path to ${CMAKE_INSTALL_PREFIX}/include, i.e. we do not specify the include directory itself, but CMake knows that the header files will be in this directory.
Then, we just have two simple tests to ensure that both libraries are found correctly and work as expected. In fact, lines 8-17 are simply the integration test we wrote for the linear algebra solver library, while lines 20-31 read the structured mesh we have provided in the mesh/ directory. Notice the relative include on line 20, where we say first go back one directory (../), and then go to mesh/structured2D.cgns. We need to do this as the test executable will be written to the build/ folder.
We could get around this by providing the mesh file itself in the build/ folder, which means we need to copy it with CMake after the build has been completed, as we saw before. In this instance, though, we use a relative path back to the root folder, which is dirty but acceptable for this simple test project.
Lines 21-22 read the mesh and get the coordinates, and for sanity checking, we print some of them on lines 27-31. That's all. As I said, there is nothing interesting here; it is to test that the libraries can be found and used correctly.
Required CMake files to build the project
Our top-level (and only) CMakeLists.txt file is given below:
cmake_minimum_required(VERSION 3.23)

project(testLibs LANGUAGES CXX)

set(CMAKE_CXX_STANDARD 17)
set(CMAKE_CXX_STANDARD_REQUIRED ON)

add_executable(${CMAKE_PROJECT_NAME} main.cpp)

find_package(linearAlgebraLib REQUIRED)
find_package(meshReaderLib REQUIRED)

target_link_libraries(${CMAKE_PROJECT_NAME} PRIVATE linearAlgebraLib::linearAlgebraLib meshReaderLib::meshReaderLib)
As per usual, we have calls to cmake_minimum_required() and project(). We also require the C++ 2017 standard on lines 5-6, as we are using the mesh reader lib library, which itself requires this standard as a minimum.
We add our test executable on line 8, where you can see I was lazy and included the only source file we have directly as an argument; no need to call target_sources() separately.
On lines 10-11, we tell CMake that we need both the linearAlgebraLib and meshReaderLib library installed before we can continue. These are set to REQUIRED and so CMake will stop execution if it can't find these libraries. Both these libraries have their own dependencies, which are specified in their respective configuration file, and so CMake will look for them as well when including these libraries. Both depend on GTest and Doxygen, but we did not REQUIRE them. However, the mesh reader library also depends on CGNS, which was set to REQUIRED.
We link both of these libraries back to our executable on line 13, after which they are available to use in our test project's main.cpp file.
There is an interesting question, then: If I compile my mesh reader library as a static library, and I compile all of its dependencies as static libraries as well (e.g. CGNS, HDF5, Zlib), could I combine all of them into a single static library? After all, static libraries are just a collection of compiled source files that get dumped into the executable, and conceptually, this would be akin to extracting four zip archives and creating a new zip file that contains the content of all four.
This would mean that we only have to include the mesh reader library and we would not need to look for its dependencies anymore (CGNS, HDF5, Zlib). People have tried, and found working solutions which are, perhaps, more of a hack than anything else. It is not cross-platform (although it could be made cross-platform with some testing), and, well, perhaps best left as a thought experiment.
We do have to provide at least the CGNS library, even though it is not an explicit project dependency (rather, it is an implicit one), and this is why we have to use Conan in the next step to make the CGNS library available for our current project.
Getting dependencies with Conan
The conanfile.txt is given below and should probably by now look predictable:
[requires]
cgns/4.3.0

[generators]
CMakeDeps
CMakeToolchain
We only require that the CGNS library is installed. There is no need to bother about GTest and Doxygen, as we are not using them while consuming the mesh reader library.
Let's go through the command line instructions to get this project compiled next:
Command line instructions
At this point, we will follow the usual steps to configure and compile our project. There shouldn't be much of a surprise here, and the steps are pretty much the same, apart from the configuration options, which are fewer now, as we do not have any project-specific settings to choose from.
Getting dependencies through Conan
First, we install our dependencies using Conan to make the CGNS library available. This is shown below:
conan install . -pr dev --output-folder=build --build=missingConfiguring the project
Next, we change into our build/ directory and execute the following line:
cmake -DCMAKE_BUILD_TYPE=Debug -DCMAKE_PREFIX_PATH=C:\temp -DCMAKE_TOOLCHAIN_FILE="conan_toolchain.cmake" -G Ninja ..We set the CMAKE_PREFIC_PATH to the location where we installed the linear algebra solver library, as well as the mesh reader library to, and tell CMake where to find the toolchain file that details where to find all of our dependencies (in this case, only CGNS).
Compiling the executable
The compilation step is the same as before and simply reads:
cmake --build . --config DebugTesting that the executable could resolve all build dependencies
So then, fingers crossed, we have compiled our executable. Hopefully, we haven't received any errors up until now, and we can finally type the following into our console:
.\testLibs.exeDid it work? Yes? Probably not! On Windows, there is one more thing. We build everything as a dynamic (shared) library. This means copying the dynamic library next to the executable, which we haven't done yet. However, it turns out Windows does support searching for dynamic libraries (which I claimed erroneously before it can't!). To do so, we have to update the PATH environmental variable on Windows.
Search for environmental variables in the search bar if you are on Windows, and change the user ones for the PATH. Add the installation prefix directory (i.e. in this case, C:\temp). You will have to close and open your PowerShell again for the changes to be recognised. Afterwards, it should work! On UNIX, it seems that CMake is able to correctly set the runtime path so the shared library is located automatically. Here, change the installation folder to something less Windows-like, e.g. ~/temp and then execute ./testLibs instead of .\testLibs.exe.
Hooray! It's time to get the champagne (well, for me at least, this article took me way longer to complete than anticipated. A celebration is in order! (But then again, it is 5 am; perhaps I should have breakfast before the champagne (also, I forgot, I don't like champagne, so I need to rummage through the downstairs cabinets ... ))). Anyhow, here is the output of the executable:
Testing linearAlgebraLib:
( 1 4 1 )

Testing meshReaderLib:
X | Y
------
0 | 0
0 | 0.25
0 | 0.5
0 | 0.75
0 | 1
Oh, and if you're wondering, I found some Matchmakers to substitute the champagne, I'll enjoy those on my commute to work now!
Summary
This (finally) concludes our article on how to extend our linear algebra solver and mesh reading library to use CMake internally to steer the compilation, testing, documentation generation, installation, and packaging in one place. From now on, we will use CMake for all subsequent projects on this website, and when we inevitably get back to either one of these libraries, we will use the CMake version developed in this article as it provides us with a fully automated workflow.
We also saw how we can consume our generated libraries within other CMake-based projects. This is more complicated than what we saw before with our complex number library, as we now have to think about the dependencies of our dependencies (in this case, our mesh reader library itself depends on the CGNS library).
If you have gone through this article in its entirety, you will have a strong foundation for writing your own libraries now that can automate the entire build and deployment stage of your software project. It is a powerful tool that will require some more getting used to. CMake isn't always the most straightforward tool to use (I still struggle sometimes with generator expressions; I don't think they feel very natural), but there are tons of good resources out there that can help us overcome these (except the official CMake documentation!)
And, finally, we have learned that Matchmakers are a good alternative to Champaign should you find yourself in a celebratory moment and are short of some bubbles (or just don't fancy them)! This last sentence will confuse google endlessly.

Tom-Robin Teschner is a senior lecturer in computational fluid dynamics and course director for the MSc in computational fluid dynamics and the MSc in aerospace computational engineering at Cranfield University.